

A word from Geoff Watts, Director of Coffee, Intelligenstia Coffee:
I’m a firm believer that understanding is developed through the act of comparison. Learning to talk about the character of a coffee from a particular origin requires that one have some frame of reference, and if the goal is to figure out what makes a coffee from Kenya great it is important to know what makes it different than other coffees. In other words, what does it mean to taste like a “Kenya”? What tastes distinguish a Guatemalan coffee from a Nicaraguan?
By evaluating coffees in a comparative setting and with an inquisitive, reflective approach one can learn to identify the most essential flavor traits of coffees from different origins. The goal should be to build a reference library of flavors and taste sensations that can become a background against which one can examine new coffees. Over time a cupper will begin to associate particular flavors with geographical regions and different botanical varieties of coffee. Eventually, a phrase like “this tastes like a bourbon from the Santa Ana region in El Salvador” can have some real meaning. It is important to remember, though, that dogma has no place in coffee tasting. Every time I think I’ve got a region figured out, a coffee comes along that shatters my expectations. Keeping an open mind and sense of curiosity is absolutely essential to becoming an accomplished taster.
Why People Cup Coffee
The cupping process was conceived as a means for evaluating and comparing different coffees on a level playing field. Because the differences between great coffees can be very delicate, observations about the characteristics of those coffees (flavor, body, finish…) can be easily influenced by small variations that occur as part of most brewing methods. By eliminating some of these variables, a carefully prepared cupping allows the coffees being tasted to compete on the basis of their own intrinsic merits.
Some degree of scientific rigor is key to conducting a fair cupping. Measurements of water and coffee grounds should be precise, any grinding equipment should be flushed between cups to prevent cross-contamination, and the pouring of hot water should be done with great consistency. Time is also a factor; once the grounds are wet the steeping process is underway, and the coffee will undergo many changes in chemistry and flavor over the next 20 minutes.
It is very important to evaluate each coffee from the start of this cycle to the finish, so most cuppers have developed a protocol for managing this sequence of events to ensure that every coffee on the table gets equal treatment.
For casual cupping at home the protocols need not be so rigid, as the stakes are quite different. Cupping coffee at home can open you up to a whole new world of what makes coffee the special thing it is to many of us. You’ll discover flavors and nuances you never thought existed in a cuppa joe. You’ll learn to evaluate and categorize coffees that would do well in your own custom blends, if you’re a home roaster, or even if you’re buying a variety of single origin beans, and post blending them at home.
Cupping is also very much a social thing. While one can cup alone, cupping is best done in a group, where you can compare and contrast notes, opinions and thoughts on what you are sampling. For many beginning cuppers, evaluating coffee with others will open your eyes and your tastebuds to nuances in a coffee you might have otherwise missed – your cupping partners will point something out and you will revisit the sample and possibly discover it yourself.
Cupping at home doesn’t have to be rigid – in fact, it shouldn’t have the rigid and complex rules and rituals that professional cupping often has. If you’re cupping at home, you’re most likely doing it for the love of coffee, the sense of adventure from trying and discovering some new things, and you’re doing it to have fun! However, if the goal is to really compare the coffees to one another, it is a good idea to strive for maximum consistency in the set-up.
In the next sections, we’ll give you a step by step guide for how to get underway. Use this as your baseline, but remember it’s okay to be flexible. It’s even okay if you omit things or make mistakes. You’re about to embark on one of the true yet little-known joys of the coffee world – evaluating coffee like you never thought possible!
Tools of the Trade
When you’re cupping coffee at home, you don’t need to buy a lot of specialist tools, but there are reasons why specific coffee cupping tools exist.
For instance, many professional coffee cuppers like to use a specifically designed, silver plated spoon for cupping because the spoon’s shape facilitates the lightning fast ‘slurping’ action (described below), and the silver plating absolutely minimizes any potential flavor altering in the coffee samples (steel and other materials may impart other tastes, however subtle).
Probably the only serious tool you’ll need to buy is an accurate gram scale, but fortunately these items can be found online for less than $30 these days in digital forms. Even a balance scale (often below $10) will suit.
If you are considering buying more specialized tools for cupping, the SCAA does sell them to both members and non members.
What you will need
We’re basing the following on the assumption you will be evaluating four coffees.
Eight cups or glasses of equal volume: ideally, you want cups that are between 5 and 7 ounces in fill volume. “Rocks” style glasses (for booze) work quite well!
Water kettle: or an electric water heater. The minimum capacity of the kettle should be 64 ounces.
Coffee grinder: The obvious preference here is a burr grinder because consistency in the grind between samples is very important.
Two pint glasses: these are used for rinse water, for washing your cupping spoons while you cup.
Four “Cupping” spoons: again, there are specially designed spoons for this, but a tablespoon style measures can also work well, or European-style “deep bowl” tablespoons. The more concave the bowl is, the better.
Gram scale: for measuring precise volumes of coffee. In a pinch, a measuring scoop will also do.
Cupping forms: for cupping in the home, these aren’t entirely necessary, but forms will help you evaluate the coffee in a more complete and concise way. It also gives you a note-taking device you can go back to when you discuss the coffee with your fellow cuppers.
Four empty coffee mugs: Cupping coffee involves a lot of sloshing, slurping and yes, even spitting. Pro cuppers have spittoons – you have a coffee mug with a handle!
A clear and focused mind: This one is very important!
There are also some optional items you may want to include:
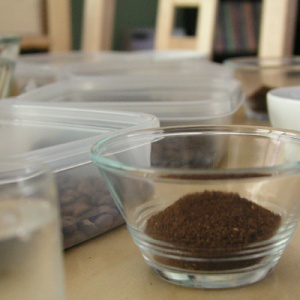
Sample trays: these are used to hold the roasted whole bean coffee for each sample, and second trays could be used to hold the green, unroasted coffee. You could purchase those super-cheap disposable square containers that Glad or ZipLock sell, and use them as sample trays.
Extra spoons: When skimming off the grounds (don’t worry, you’ll find out what this means below), having a few extra spoons to do it is nice
What about the coffee?
Your next decision is what coffee should you be evaluating. First, starting with three or four coffees is best, though you can certainly cup more than this (you’ll need more of the tools listed above to do so in one session).
As for what coffee to choose, consider this. Sometimes, professional cuppers want to evaluate four or more different coffees from the same region to see how they compare and contrast – they want to find the best samples from a specific region, so they will compare four, eight, twelve or more coffees in one major session. Other times, cuppers may want to evaluate different coffees from different regions that may have similar taste profiles (or reputations for taste profile). They do this so they can have a set of “back up” beans to go to in the future if their current choices somehow pale down the road (remember, coffee is a crop, and as such can change season to season, year to year, even bag to bag).
At home, the choice is yours – you could pick three or four completely different coffees if you want, or pick a bunch from the same growing region or country. Online vendors of green coffee, like SweetMarias, Coffee Bean Corral, Coffee Wholesalers and many others will often have two, three, four or more coffees from the same regions.
You may also want to choose coffees based on their reputation (or previous cupping notes you’ve read: www.coffeereview.com is a good place to see tasting notes), and cup them yourself to see if you taste and evaluate the coffee the same way the pros did.
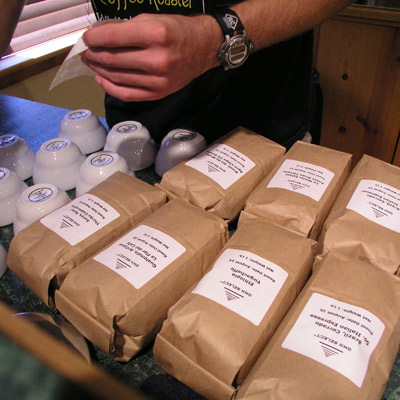
Once you’ve chosen your coffees, try to make sure the coffee is roasted at the same level and same roast color. If you home roast, this is easy – just roast all the sample green to the same level, and roast it at the same time (let the coffee rest for a day or two before cupping). If you buy roasted coffee, seek out a microroaster in your area, tell them you want to cup coffee at home, and ask that they sell you beans roasted on the same day.
Now that you have your coffee and you’ve gotten the controllable variables down pat, what do you do? Read on!
Step-by-Step
Assuming you have chosen your coffees, and you have gathered all your tools, you’re ready to delve in!
Set Up
Cupping is a social thing and also usually a “recording” thing, as in people need to write down their thoughts (though for your first time we recommend just talking about the coffees after the cupping is done). So choose a space in your home where there’s plenty of room for all the cuppers to move around in, and have places to write down their comments on cupping forms.
For many, the kitchen might be ideal; for others, a clean dining table works best.
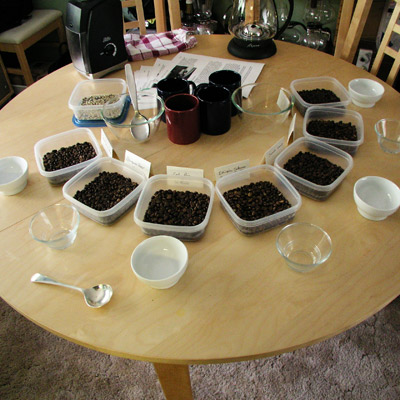
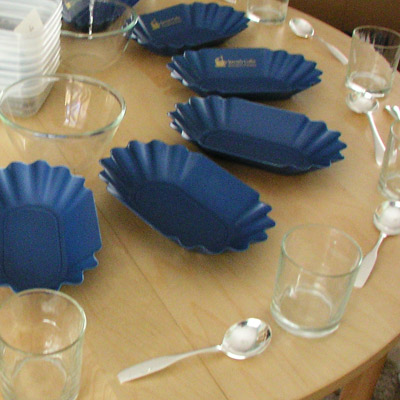
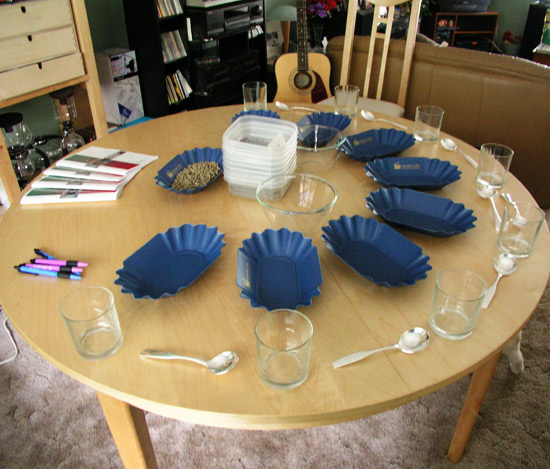
Take all your tools and set them up in your chosen cupping area. Look at the picture to the left for a typical setup, but also note the setup pictured only has one “tasting cup” per coffee sample – you’ll note below in the step by step that we recommend having two tasting cups per coffee sample (for compare and contrast situations on the same coffee). Again, you can be as flexible as your want, but having two samples of each coffee type can help you evaluate the coffee better, and it gives the opportunity for more “breaking of the crust” by more people.
Step-by-Step Instructions
Here we go. The steps are numbered for your convenience! 🙂
- Measure the whole bean coffee into their cups or glasses, keeping track of which is which. Some cuppers like to use a post-it note or sticky tape on the bottom of each cup to identify what each coffee is. This way, it’s out of sight, out of mind until you’re ready to see which coffee is which (usually once the cupping is over).
As outlined above, use two glasses per coffee being evaluated, and choose a ratio of water to coffee that you find enjoyable. Experiment! But if you need a starting point, at Intelligentsia, we use 12 grams of coffee for 6.5oz of boiled water.
- Start your water kettle at this point so that your boil times close to when your cupping table is set up and ready to go (ie, after steps 3 and 4 are complete). If possible, use fresh, filtered water.
- Grind each cup individually, making sure to brush out the grinding chamber and completely empty the grinder between each sample. Simply dump the coffee from your tasting cup into the grinder, grind all of the coffee, then pour the grinds back into the tasting cup.
- Reset your table as you grind (try to grind as quickly as possible so your coffees don’t stale). You may choose to cup blind (an industry term meaning the cupper does not know what coffee he or she is evaluating). This is where the labels on the bottom of the cup make sense. Or you could cup knowing what each coffee is (keep the bag behind each cupping setup). Most cuppers prefer to cup blind because it protects your subconscious from influences and biases… “hrmm, this is Jamaican Blue Mountain, so it must be good!!!” 🙂
- Many cuppers use this time before the kettle is boiled to sniff and evaluate the ground coffee from each sample. For beginners, this is an optional step, but you can certainly do it (and make mental notes about the smell of each sample) prior to pouring the boiled water.
- When the water is done boiling, remove it from heat (or after it shuts off), and wait 25 seconds before pouring. In the pro world, the ideal pouring temperature is 202F; you just have to be close. Also pour in the order you ground your coffees – the oldest grind gets water first.
Pour slowly and methodically, making sure all the coffee grounds are saturated – try to avoid any dry clumps on the top of the coffee. Remember to use your desired amount. You can know this by first doing a dry run: measure out 6.5 oz of water, and pour it into one of your cupping glasses that contain the 12 grams of coffee. Note the level. When you’re doing the real pouring for the real cupping, just pour to the same level.
- When you start the pouring, mark the time, either by looking at the clock or by starting a timer. Wait 3 to 4 minutes (most pro cuppers give 4 minutes) as the coffee grounds start to settle, then it’s time to start evaluating the coffee.
- Now it’s time to get down and dirty (and close!). Get your face close to the cup, because you’re about to do something called “breaking the crust”. In the four minutes the coffee and water have interacted, a thick “crust” of grounds will be sitting on the top of the sample cup. Get your face close to the cup, take your cupping spoon and puncture the ground crust while inhaling the aromatics that will waft up. The most common action while doing this is to place your spoon horizontally to your face, near the forward “lip of the cup”, dip it into the crust, and drag it to the back portion of the cup. Soak up those aromas!
- Repeat this for each sample. If you are cupping alone, do both cups for each sample. If others are involved, let everyone get the chance to “break the crust” on at least one cup. The others can still go to each cup and further “break the crust” and evaluate the aromas. Keep things moving fast here, but make sure you sample every cup.
- Once the breaking of the crust ritual is done, it’s time to skim off the remaining top grounds. Pro cuppers traditionally do this by taking two cupping spoons, placing them into the cup near the back of the cup, then in a fluid, relaxed motion, drag them forward around the edges to meet again at the front of the cup, then scoop up just taking out grounds, leaving as much liquid behind as possible.
- Clear your head! Seriously! Temporarily forget the aromas and such, and get ready to taste.
- Begin tasting the coffees, taking a spoonful at a time and “slurping” it into your mouth while inhaling gently. The goal here is to have each liquid sample coat your entire tongue, but also the inhaling allows aromatic elements to exert their full effect.
Put another way, the goal is to “spray” the coffee across your palate while getting some aroma retro-nasally. If you’ve ever seen experienced wine tasters do their thing (or you’ve done it yourself), this method of drinking will be familiar.
- Always rinse your spoon in the water-filled pint glasses between each cup. The goal is to avoid cross-contamination of the samples.
- Move around the table, sampling every cup. Then go back and forth to each coffee several times as the coffees cool down to room temperature. Be sure to evaluate each coffee with a fresh perspective each time you sample it. You want to see how the coffees fare at different stages in their cooling down, but don’t be overly influenced at this point how a specific coffee may taste at one temperature vs. another temperature (this will come later).
- It is perfectly acceptable to spit out your “slurps” of coffee as you go along, but you should also swallow some of the tastings to evaluate the aftertaste and finish.
And that’s the cupping portion. Here’s some additional notes to consider.
During a cupping session, most pros like to keep silent until everyone has finished. The mind is incredibly susceptive to suggestion and if your friend takes a sip of coffee and goes “wow, that tastes like apricot jam!!!”, it is quite likely you’ll find a way to taste jam somewhere.
Once the cupping is finished, then you can discuss, argue and debate the merits and comparative qualities and characteristics of the coffees with your friends. Take notice of where you agree and disagree, or how you’ve managed to describe the same qualities using different sorts of descriptions.
Congratulations! You’re on your way to being a cupper, and you’ve got a cupping under your belt! Now let’s move on to some notes and discussion on the tasting, and terms you should make yourself familiar with.
Taste and Process
One of the most important skills of a good cupper is the ability to focus clearly and sharply on the task at hand. Taste can be a very fleeting sensation, and in the span of microseconds many flavors will wash across the palate at the same time. The challenge is to become skilled at noticing, identifying, and describing those flavor sensations in a way that is meaningful to you.
There can be a wide range of vocabulary that is used to describe the tastes found in coffee. Descriptors range from the familiar (chocolatey, sweet, fruity) to the conceptual (clean, vibrant, sturdy) to the wildly esoteric (summery, racy, gentlemanly). I’ve heard coffees compared to Kevin Costner, Honda Accords, and cold winter nights.
What matters is that the description is purposeful and attempts to communicate the essential nature of the coffee using language that people can relate to. Taste can be a very personal experience, and memories of tastes that you’ve experienced in the past form the background against which new tastes are evaluated and understood. Over time, a diligent cupper will develop a collection of useful descriptors that can be used to contrast and compare coffees in a meaningful way.
It is useful to use a few key characteristics of coffee as landmarks when making comparisons.
The following are some of the most commonly used:
Acidity: This can be described as the pleasing brightness or sharpness in the coffee. It is through the acidity that many of the most intriguing fruit and floral flavors are delivered, and is usually the most scrutinized characteristic of the coffee. Acidity can be intense or mild, round or edgy, elegant or wild, and everything in between. Usually the acidity is best evaluated once the coffee has cooled slightly to a warm/lukewarm temperature. Tasting a coffee from Sumatra next to one from Kenya is a good way to begin to understand acidity.
Body: This is sometimes referred to as “mouthfeel”. The body is the sense of weight or heaviness that the coffee exerts in the mouth, and can be very difficult for beginning cuppers to identify. It is useful to think about the viscosity or thickness of the coffee, and concentrate on degree to which the coffee has a physical presence. Cupping a Sulawesi versus a Mexican coffee can illustrate the range of body quite clearly.
Sweetness: One of the most important elements in coffee, sweetness often separates the great from the good. Even the most intensely acidic coffees are lush and refreshing when there is enough sweetness to provide balance and ease the finish. Think of lemonade…starting with just water and lemon juice, one can add sugar until the level of sweetness achieves harmony with the tart citric flavor. It is the same with coffee, the sweetness is critical to allowing the other tastes to flourish and be appreciated.
Finish: While first impressions are powerful, it is often the last impression that has the most impact. With coffee the finish (or aftertaste) is of great importance to the overall quality of the tasting experience, as it will linger long after the coffee has been swallowed. Like a great story, a great cup of coffee needs a purposeful resolution. The ideal finish to me is one that is clean (free of distraction), sweet, and refreshing with enough endurance to carry the flavor for 10-15 seconds after swallowing. A champion finish will affirm with great clarity the principal flavor of the coffee, holding it aloft with grace and confidence like a singer carries the final note of a song and then trailing off into a serene silence.
A few thoughts on the process
Cupping can be immensely pleasurable even for the most novice tasters. There is no better way to understand and explore the unique tastes of coffee than to examine them side by side, looking for differences between coffees and using them to shed light on the essential character of the cup.
Over time, a cupper becomes adept at zeroing in on those tastes and sensations that are most central to the coffee, looking at the ‘skeleton’ of the coffee as well as the cosmetic surface. All of this deconstruction is important when comparing coffees from the same origin in search of the real treasures.
However, when tasting anything there is a very basic reduction that can be done, one that cuts straight to the heart of the matter. Ask yourself—Is it good, or is it truly great?
Cupping Forms
Any cupping form is nothing more than a tool to help a taster organize their thoughts. That said, you do not need a cupping form to evaluate coffee, and for true beginners, it may be a distraction. In many microroasteries around the world, regular cuppings go on every day, and the professionals will simply debate, contrast and compare the coffees, saving the more formal cuppings for a weekly or monthly ritual (complete with forms).
We have a couple of forms here for you to grab and use.
The Intelligentsia Simplified Form
This first form is a slightly simplified version of the one that we use in our lab at the Intelligentsia Roasting Works. Download it now (PDF, 10kb).
Unlike forms you may have seen elsewhere (such as the Cup of Excellence one, which is extremely complex), this one does not produce a final rating that is the sum of categorical scoring. Instead we employ the Intelligentsia Universal Balance System (so named by a good friend of mine in the coffee trade) where the score is determined non-arithmetically by the cupper so as to be in full harmony with his feelings about the overall quality of the coffee.
With any evaluative cupping that involves scoring, the key is always the relative experience of the cupper and the size of their ‘reference library’. One could say a particular Nicaraguan coffee rates an 8.3 in acidity, but that number means nothing in a vacuum. It only takes on significance in a context where one can compare the relative acidity of many different coffees and over time develop a firm idea about how intense the acidity of any coffee must be to achieve an 8.3. Someone who has purposefully tasted thousands of coffees in a comparative setting will have a big reference library, and can score a new coffee in a way that reflects its relative qualities as compared to those thousands of other ones.
However, this form is easy to use even for the beginning cupper, as the final rating can follow the traditional scholastic grading process where
90-100 = A
80-89 = B
70-79 = C
and so forth. I think it is important to note, though, that one needn’t apply a score at all to understand the coffee. I know cuppers who have been in coffee for 25 years and who really don’t like numerical scoring systems at all. They would argue that such systems reduce a coffee to the sum of its parts and end up missing some of the story along the way.
Whatever your philosophical position, this form is designed to meet your needs just fine.
Using the Intelligentsia Form
The first thing you should note is the aromatic properties of the cup. There is space to jot down impressions as well as a bar to note the intensity of the aroma.
The numbers (5-10) are there for reference purposes to note the overall intensity of, say, the sweetness. We start at five because if it is below five it doesn’t even merit discussion.
There is space next to each category that is intended for descriptors that apply specifically to that quality; for example, you might feel the acidity is particularly fruity, and you may want to distinguish between fruity acidity and a fruity finish or fruit-like sweetness.
Below that is a space for general commentary about the coffee, and a rating box where one can, if desired, assign a score…or a simple smiley face if that is preferred!
Remember, the goal is to understand and remember what it is about the coffee that you like or dislike, so whatever makes sense to you is of course the best way to go about it.
The CoffeeGeek Form
This form was developed by CoffeeGeek for internal cupping tests and evaluations of coffee for the website, but also presents an alternative form for you to use while cupping. Download Now (PDF, 45kb).
The CG Cupping Form is similar to the Intelligentsia form: things like acidity, mouthfeel (body), flavour (sweetness) and aftertaste (finish) are evaluated on both forms. But the CG form is more closely associated with the SCAA’s traditional cupping form, albeit with more emphasis on some elements.
The CG Form is broken down into the following categories, with a score of 5 to 10 applicable for each (5 assumes it is still “specialty coffee” quality, but the lowest of the low. 10s should never be given out except for something that completely blows your mind):
Aroma Comments: At CoffeeGeek, when we evaluate coffees we have a two stage aroma judgment – we evaluate the aroma from the freshly ground coffee, then the aroma again when the crust is broken. There is space for notes, and a scoring box. Don’t put a score down until you’ve broken the crust, but write your notes anytime.
Acidity: Pretty much identical to what was written on the previous page of this guide – when we score this, we score for how much the brightness or acidity is present, and how well it complements the overall cup.
Mouthfeel: This is an evaluation of the body taste of the coffee, how it coats the palate, how it balances, and how it interacts on the four flavor zones of your tongue. If a coffee was deep and rich in the body, and balanced well on the tongue, it may score an 8 or 9.
Flavour: this one is the catch all for all the actual “tastes” the coffee gives us. If the tastes are pleasant and/or directly identifiable, it would score higher. Use the writing space to write down the fleeting flavour notes you may taste.
Aftertaste This is a specific evaluation of how the coffee’s finish is in your mouth. A lingering, pleasant, non bitter and non sour aftertaste that shows even more flavours coming out would score an 8 or 9. Remember, 10s aren’t given out except in very rare circumstances.
Balance, overall notes: At CoffeeGeek, we like to evaluate a coffee as a set of individual components (listed above), but also overall as a coffee beverage. Also, because something like acidity is judged as a scored element, sometimes this may score low (ie, low acidity), but the coffee as a whole is awesome, so the balance and overall notes brings it up if warranted. The “cuppers points” are where you may add or remove as much as five points here.
Final Scoring: again, remember this is subjective. You can either add fifty points to get the overall score, or times everything by two, then add the cuppers’ points to the total. The form chooses the former, but the latter is just as acceptable. Pick one calculation method, then stick with it.
This form is designed to allow you to take a lot of “on the fly” notes as you cup. You can even put tick marks in each writing space to keep track of what you’d like to score each element.