Pool installation starts before the first hose is turned on. The ground beneath it, frame layout, and liner position shape how the structure sits once full. A few careful checks at the start help avoid uneven walls, liner folds, and loose fittings. This guide sets out each stage clearly, from site choice to the first water test.
Pick the Right Spot First
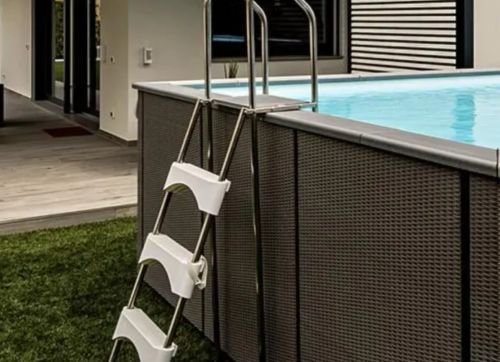
Pick a flat area with clear access on each side. The above ground pool should sit away from roots, branches, drains, and loose soil. Measure the pool size plus space for the ladder and filter. Leave room to walk around the edge during checks.
Check local rules before site work starts. Some areas may need pool barriers or permit approval. The sun helps warm water, but trees add leaves and extra debris. A well-drained spot helps to keep supports steady.
Base Preparation
Ground Assessment Before Base Work
A professional installer clears the site of stones, sticks, grass clumps, roots, and sharp debris before base work begins. The surface is then checked for firmness, level, and drainage. Even a small dip can shift water pressure toward one wall once the pool is full. A long, straight board and a level help identify raised areas or low sections.
Where the manufacturer allows it, the installer may use sand or crusher dust to support the base. The material is spread and compacted to suit the pool design and site conditions. A ground cloth is placed after the surface is clean and level.
Frame Assembly by a Professional Installer
A professional installer checks each component against the manufacturer’s parts list before assembly begins. Rails, joints, pins, caps, and supports are set out in order to prevent mix-ups during the build. Any part that does not align correctly is reviewed before force is applied.
- Small fittings are kept together in a labelled tray for easy access.
- Rails and legs are arranged in groups before frame assembly begins.
- Any tight or loose joint is checked against the installation manual before the next stage.
Liner Placement and Equipment Setup
A professional installer places the liner inside the frame after the base is checked for grit, sharp debris, and uneven sections. Major folds are smoothed by hand, and the liner is centred before clips or sleeves are secured. The installer checks that the material sits evenly around the wall line.
The pump and filter are placed on firm, dry ground near the pool. Hoses are fitted with gentle curves to avoid strain at the connection points. Clamps, valves, and seals are checked before the main fill begins. Correct equipment setup may help improve water circulation after installation.
Controlled Filling and Final Checks
The installer adds a shallow layer of water, then inspects the liner floor, frame legs, and wall shape. Water levels should rise at a similar rate around the pool edge. Any uneven rise can point to a base issue that needs attention before the fill continues. Early checks help prevent pressure from building on one side.
The pool is filled in stages while connections and wall supports are reviewed. The ladder is fitted at the point stated in the manufacturer’s instructions. Chemicals are added once the water volume and filter setup are confirmed. The installer runs the filter and tests the water before the pool is ready for use.
Good installation is careful, plain work from start to finish. A level base, square frame, smooth liner, and secure filter each have a role. Small checks at each step may help improve pool life and safe use. Once the water test looks right, the pool can move into routine upkeep.
About the Author